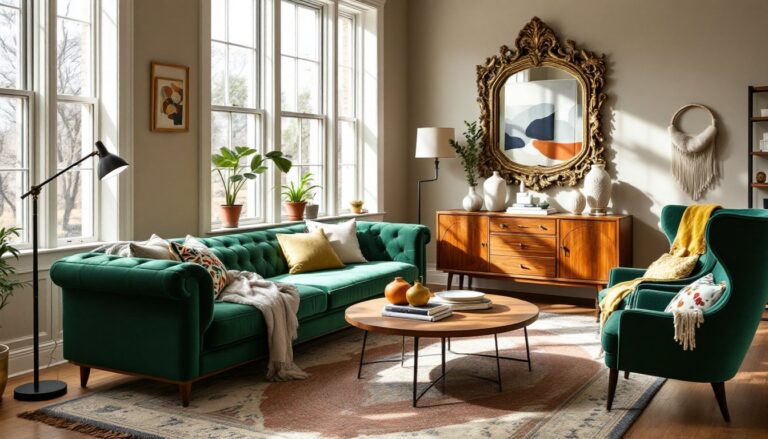
A blank wall in a living room isn’t just wasted space, it’s a missed opportunity. Gallery walls have become one of the most versatile design tools for homeowners looking to add personality, depth, and visual interest without very costly or committing to major renovations. Unlike a single large piece of art, a gallery wall lets you mix textures, colors, frames, and personal mementos into a cohesive display that evolves with your style. Whether you’re working with a narrow wall beside the sofa or a full expanse above the mantel, the right gallery wall can anchor your room and give it that finished, curated feel.
Table of Contents
ToggleKey Takeaways
- Gallery wall ideas for your living room transform blank walls into personalized focal points that add depth and visual interest without requiring expensive renovations.
- Choose between a grid layout for clean, modern aesthetics or a salon-style arrangement for eclectic, personal appeal—both work equally well depending on your room’s design.
- Plan your gallery wall layout with paper templates and painter’s tape before hammering any nails to ensure balanced spacing and proper alignment.
- Coordinate frame materials (wood, metal, or composite) and artwork selection with your living room’s color palette and furniture style to create a cohesive design.
- Hang your gallery wall with proper hardware rated for frame weight, use a laser level for accuracy, and start from the center outward to maintain consistent spacing of 2–4 inches between frames.
- Enhance your finished gallery wall with lighting, layered three-dimensional elements, and the flexibility to rotate or refresh artwork seasonally.
Why Gallery Walls Work So Well in Living Rooms
Gallery walls thrive in living rooms because they solve multiple design challenges at once. They fill vertical space, draw the eye upward (making ceilings feel higher), and create a focal point that doesn’t require structural changes or expensive built-ins.
Living rooms are high-traffic, multi-functional spaces where people gather, relax, and entertain. A well-planned gallery wall reflects the homeowner’s taste while tying together disparate furniture styles or color palettes. It’s also forgiving: if you don’t love the arrangement, you can swap pieces or adjust spacing without calling a contractor.
From a practical standpoint, gallery walls work on nearly any wall type, drywall, plaster, or even brick with the right hardware. They’re ideal for renters using picture-hanging strips or homeowners willing to drill into studs for heavier frames. The flexibility in scale and style means they fit everything from minimalist modern spaces to eclectic, layered interiors.
Planning Your Gallery Wall Layout
Before you hammer a single nail, plan your layout. Grab painter’s tape, kraft paper, or newspaper and trace each frame. Cut out the templates, tape them to the wall, and step back. This lets you adjust spacing, balance, and alignment without leaving a dozen extra holes.
Measure your wall dimensions carefully. A gallery wall should fill roughly two-thirds to three-quarters of the available width to feel intentional, not sparse. For walls above a sofa, leave 6–10 inches of clearance above the backrest to avoid a cramped look.
Decide on a visual anchor. Many layouts work outward from a central piece (the largest or most colorful frame) or establish a horizontal or vertical axis. Mark the center of your wall at eye level (typically 57–60 inches from the floor) as your baseline.
Grid Layout: Clean and Contemporary
A grid layout uses identical or similarly sized frames arranged in evenly spaced rows and columns. Think of it as a modular system: 3×3, 4×2, or even a single horizontal row of five frames.
Why it works: Grid layouts feel organized and calm. They’re ideal for modern or transitional living rooms where symmetry and clean lines dominate. This layout also simplifies the hanging process, you’re working with consistent spacing (typically 2–3 inches between frames) and parallel lines.
Frame and art considerations: Use matching frames (same color, material, and mat width) to emphasize the geometric precision. Black or white frames in wood or metal keep the focus on the artwork. For a bolder look, mix black-and-white photography with line drawings or abstract prints in a limited color palette.
Hanging tips: Use a laser level to mark your horizontal and vertical guides on the wall. Measure and mark each nail point before you start. For drywall, #6 or #8 finishing nails work for lightweight frames (under 5 lbs each): use picture hangers rated for 20–50 lbs or wall anchors for heavier pieces. If you’re hanging a large grid, consider a French cleat system for the top row to distribute weight across studs.
Salon Style: Eclectic and Personal
Salon style (also called organic or collage layout) mixes frame sizes, shapes, and orientations in an asymmetrical, layered arrangement. It borrows from 18th-century European galleries, where walls were packed floor-to-ceiling with art.
Why it works: This layout feels lived-in and personal. It’s perfect for showcasing a variety of pieces, family photos, vintage prints, mirrors, small shelves, or even three-dimensional objects like plates or woven baskets. Salon walls suit eclectic, bohemian, or traditional living rooms where collected-over-time charm matters more than rigid symmetry.
Frame and art considerations: Embrace variety, but establish a visual thread to keep it cohesive. Common strategies include:
- Consistent frame finish (all gold, all natural wood, or all matte black)
- Unified color story in the artwork (warm tones, cool blues and greens, or black-and-white)
- Repeated mat color (white or cream mats in every frame)
Mix orientations (portrait, landscape, square) and sizes, but balance the visual weight. Place larger or darker frames toward the bottom and corners: smaller, lighter pieces fill gaps.
Hanging tips: Start with your largest or most important piece and hang it first at eye level. Work outward, keeping 2–4 inches of spacing between frames. Use your templates to test arrangements on the floor before committing. For heavy or oddly shaped pieces, locate studs with a stud finder and use wood screws or toggle bolts rated for the weight.
Choosing the Right Frames and Artwork
Frames and artwork set the tone. Don’t just grab whatever’s on sale, think about how the gallery wall relates to your existing furniture, trim, and wall color.
Frame materials and finishes:
- Wood frames (oak, walnut, maple) add warmth and suit traditional, farmhouse, or mid-century spaces. Natural or stained finishes highlight wood grain.
- Metal frames (aluminum, steel, brass) read modern and sleek. Black metal pairs well with industrial or minimalist styles: gold or brass adds a touch of elegance.
- Composite or MDF frames are budget-friendly and come in endless finishes. They’re lighter, which simplifies hanging.
Mat boards matter. White or off-white mats create breathing room around artwork and unify disparate pieces. For a bolder look, try colored mats that echo a hue in your art or upholstery. Standard mat widths range from 2–4 inches: wider mats (3–4 inches) lend a gallery-quality feel.
Artwork selection:
- Prints and posters: Affordable and replaceable. Look for high-quality giclée prints on archival paper if longevity matters.
- Photography: Personal photos, vintage prints, or fine art photography. Black-and-white photos are timeless: color photos should coordinate with your room’s palette.
- Original art: Paintings, drawings, watercolors, or mixed media. These add authenticity and character but come at a higher price.
- Mirrors and objects: Small mirrors reflect light and add dimension. Decorative plates, textile art, or shadow boxes break up the flatness.
Size and proportion: Vary frame sizes to create visual interest, but keep a sense of balance. In a salon-style wall, mix 8×10, 11×14, and 16×20-inch frames with a few smaller 5×7s. In a grid, stick to one or two sizes (e.g., all 11×14 or a mix of 8×10 and 12×12).
Inspiration for layouts and styling can be found in resources like House Beautiful’s gallery wall showcase, which features diverse arrangements suited to various room styles.
Step-by-Step Guide to Installing Your Gallery Wall
Materials and tools you’ll need:
- Picture frames with hanging hardware (D-rings or sawtooth hangers)
- Measuring tape
- Laser level or 4-foot spirit level
- Pencil
- Painter’s tape or kraft paper templates
- Hammer
- Picture-hanging nails, screws, or wall anchors (rated for frame weight)
- Stud finder (for heavy pieces)
- Optional: picture-hanging strips (for renters or no-hole solutions)
Installation steps:
-
Prep and plan. Clear the wall and furniture below. Create paper templates of each frame and tape them up in your chosen layout. Step back, take a photo, and adjust until it looks balanced.
-
Mark your centerline. Measure and mark a horizontal line at 57–60 inches from the floor (eye level). This is your visual anchor. For a grid, this might be the midpoint between rows: for salon style, it’s often the center of your largest frame.
-
Transfer template marks. With templates taped up, mark the hanging point on each template (measure from the top of the frame to where the nail or screw will sit, account for wire sag if using picture wire). Poke a small pencil mark through the template onto the wall.
-
Locate studs for heavy frames. Use a stud finder to locate studs (typically 16 inches on center). If a heavy frame (over 20 lbs) doesn’t align with a stud, use drywall anchors or toggle bolts rated for the weight. Standard drywall can hold about 10 lbs with a nail: anchors increase that to 50+ lbs.
-
Hang from the center outward. Start with your central or largest piece. Hammer in the nail or insert the anchor, hang the frame, and check level. Adjust if needed. Work outward, hanging adjacent frames and maintaining consistent spacing.
-
Check alignment as you go. Use your level frequently. Small adjustments now save frustration later. If a frame is slightly off, gently tap the nail at an angle to shift it.
-
Final adjustments. Once all frames are up, step back and assess. Frames should feel visually balanced, with consistent spacing and no obvious tilts. Use a small level on top of each frame to fine-tune.
Safety and code notes: Gallery walls are cosmetic and don’t require permits. But, if you’re drilling into brick or masonry, use a hammer drill with masonry bits and appropriate anchors. Wear safety goggles to protect against flying debris. For plaster walls, drill pilot holes to prevent cracking.
Styling Tips to Make Your Gallery Wall Stand Out
A well-installed gallery wall is half the battle. Styling is what makes it memorable.
Layer in three-dimensional elements. Break up the flatness by adding a small floating shelf, a woven basket, or a decorative plate. This adds depth and texture, especially in salon-style arrangements that benefit from collected, tactile objects available through home design platforms.
Coordinate with your room’s palette. Pull one or two accent colors from your living room set, throw pillows, area rug, or curtains, and echo them in your artwork or mats. This ties the gallery wall into the broader design and keeps it from feeling like an afterthought.
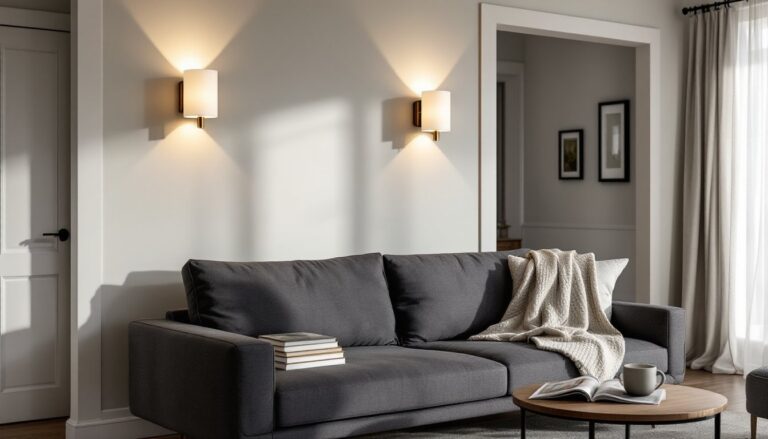
Light it properly. A gallery wall in shadow loses impact. If overhead lighting is insufficient, add picture lights (battery-operated or hardwired) or adjustable track lighting aimed at the wall. Warm LED bulbs (2700–3000K) enhance artwork without washing out colors.
Rotate and refresh. One advantage of gallery walls is flexibility. Swap out a few pieces seasonally or when you find new art. This keeps the space feeling dynamic and personal.
Avoid common mistakes:
- Hanging too high. The center of your gallery wall should be at eye level, not up near the ceiling.
- Inconsistent spacing. Whether you choose 2 inches or 4 inches between frames, keep it uniform.
- Ignoring scale. A tiny cluster on a massive wall looks lost: a packed arrangement on a narrow wall feels cluttered. Fill roughly two-thirds of the available width.
- Skipping templates. Eyeballing it leads to extra holes and uneven spacing. Always mock it up first.
Finally, don’t overthink it. Gallery walls are meant to be personal and evolving. Start with what you love, hang it with care, and adjust as your style grows.