Single wide trailers, typically 14 to 18 feet wide, present a specific design challenge. The living room often doubles as the main gathering space, hallway, and visual focal point, all within 150 to 250 square feet. But a narrow footprint doesn’t mean sacrificing style or comfort. With intentional furniture choices, strategic color use, and clever storage, these spaces can feel open, functional, and welcoming. This guide walks through practical solutions that work with the unique constraints of single wide layouts, turning what might feel like a limitation into an opportunity for smart, purposeful design.
Table of Contents
ToggleKey Takeaways
- Single wide trailer living room ideas succeed when furniture is floated 6 to 12 inches away from walls, breaking the tunnel effect and creating visual breathing room in narrow spaces.
- Light, neutral wall colors combined with layered lighting using warm white LEDs (2700–3000K) expand the space visually and make the room feel more inviting.
- Vertical storage solutions, including floor-to-ceiling shelving and wall-mounted cabinets, maximize square footage without sacrificing the open feel essential in compact living rooms.
- Choosing compact furniture like a loveseat (72 to 76 inches) and multi-functional pieces such as storage ottomans and benches optimizes both comfort and functionality in limited footprints.
- Budget-friendly updates like painting, upgrading light fixtures ($30–$100), and installing luxury vinyl plank flooring deliver immediate visual impact without major structural changes.
- Mount the TV at eye level (42 to 48 inches) and maintain at least 30 inches of clear walkway to balance media enjoyment with necessary traffic flow in pass-through spaces.
Understanding the Unique Layout of Single Wide Living Rooms
Single wide trailers follow a linear floor plan, with rooms stacked end-to-end or side-by-side along a central hallway. The living room usually sits at one end or near the center, with a width of 12 to 14 feet (actual interior dimension after wall framing). Ceiling heights typically range from 7 to 8 feet, and windows are often smaller and fewer than in site-built homes due to structural and transport limitations.
This layout creates two main challenges: limited natural light and a bowling-alley effect when furniture is pushed against the walls. Traffic flow matters more here than in wider homes. If the living room connects to the kitchen or sits between bedrooms, it becomes a pass-through zone, not just a destination.
Most single wides are built with 2×3 or 2×4 wall studs on 16-inch centers, with thin paneling or drywall. This means you can’t always rely on walls for heavy shelving without hitting a stud or using appropriate anchors rated for thin-wall applications. Floors are typically particle board or OSB over floor joists, often with vinyl or low-pile carpet. Knowing these structural realities helps when planning renovations or mounting hardware.
Strategic Furniture Placement for Narrow Spaces
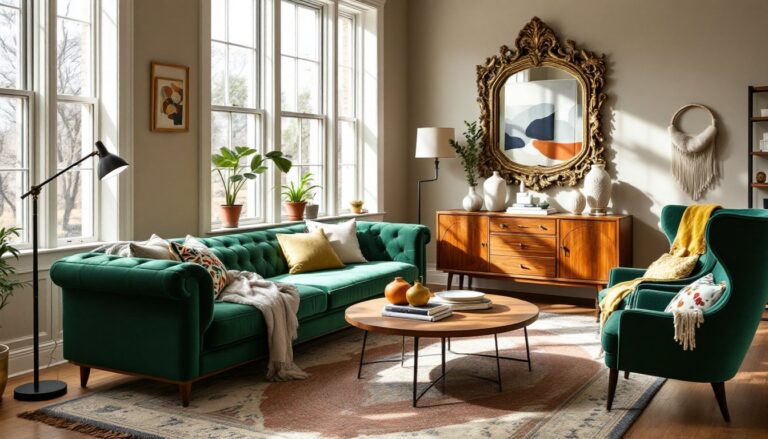
In a narrow living room, floating furniture away from the walls, even by 6 to 12 inches, can paradoxically make the room feel larger. It breaks the tunnel effect and creates visual breathing room. A loveseat or apartment-scale sofa (72 to 76 inches long) works better than a full-size sectional. Pair it with a compact armchair or two poufs instead of bulky recliners.
Arrange seating to define zones. If the living room shares space with a dining area, use the back of the sofa as a subtle divider. A narrow console table (10 to 12 inches deep) behind the sofa adds surface space without eating up floor area. Avoid coffee tables wider than 36 inches: a round or oval shape improves traffic flow and prevents shin-bruising in tight quarters.
Wall-mounted or floating TV units free up floor space and keep sightlines open. Mount the TV at eye level when seated, usually 42 to 48 inches to the center of the screen. If the room is a pass-through, keep at least 30 inches of clear walkway on one side. Furniture with legs (rather than skirted bases) lets light pass underneath, making the room feel less cramped. Designers using multi-functional living room sets often emphasize pieces that serve dual purposes without adding bulk.
Color and Lighting Tricks to Expand Your Space
Light, neutral wall colors, soft whites, warm grays, or pale beiges, reflect available light and push walls back visually. Avoid stark white, which can feel cold under the often yellowish lighting in older trailers. A single accent wall in a deeper tone (navy, charcoal, or sage) adds depth without closing in the space, especially if placed on the shortest wall.
Paint the ceiling the same color as the walls, or go one shade lighter. This erases the visual boundary and makes the ceiling seem higher. If the ceiling is textured popcorn or has seams from paneling, consider a light knockdown texture or smooth skim coat before painting. Prep work matters: clean, prime with a stain-blocking primer (especially over old paneling), and use at least two coats of quality paint. One gallon typically covers 350 to 400 square feet, so budget accordingly.
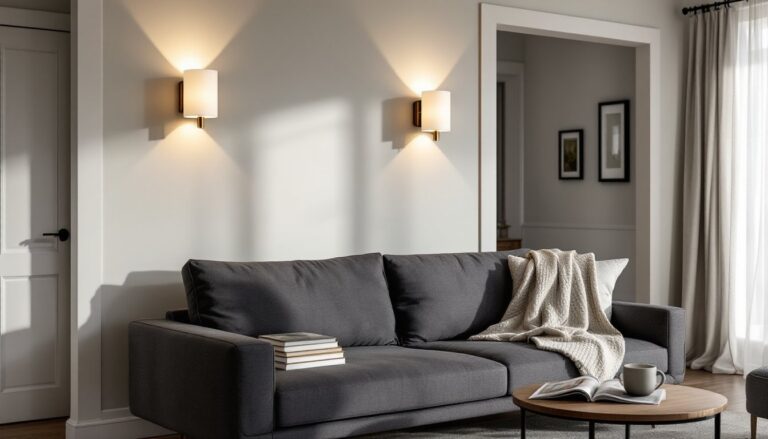
Lighting in single wides is often limited to a single overhead fixture. Layer in multiple light sources: a floor lamp in one corner, a table lamp on a side table, and under-cabinet or LED strip lighting if the living room opens to the kitchen. Warm white LEDs (2700–3000K) mimic incandescent bulbs and feel more inviting than cool white. Sheer curtains or cellular shades let in natural light while maintaining privacy: avoid heavy drapes that shrink windows visually. Interior designers featured on Apartment Therapy frequently highlight how layered lighting transforms small spaces without requiring structural changes.
Smart Storage Solutions That Don’t Sacrifice Style
Vertical storage is your best friend. Floor-to-ceiling shelving units (DIY or ready-made) draw the eye upward and maximize every inch. Use 1×12 pine boards or plywood on adjustable brackets: space shelves 10 to 14 inches apart for books and decor. Anchor into studs or use toggle bolts rated for at least 50 pounds per anchor in thin walls.
Ottomans and benches with hidden storage hold blankets, remotes, or kids’ toys. A storage bench under a window doubles as seating and a display ledge. Wall-mounted cabinets or cubbies keep items off the floor, which is critical in a space where every square foot of floor area counts.
Basket and bin systems organize without looking clinical. Label them if you’re storing multiple categories (electronics, crafts, seasonal items). Floating shelves in dead zones, above doorways, along hallways, or flanking the TV, add storage without footprint. Many budget-conscious DIYers turn to IKEA Hackers for creative ways to adapt modular shelving and cabinetry to odd trailer dimensions. Safety note: Secure tall furniture to the wall with anti-tip straps, especially if you have kids or pets. Mobile homes can shift slightly, and unsecured units can topple.
Budget-Friendly Updates That Make a Big Impact
Swapping out dated light fixtures instantly modernizes a space. A semi-flush mount or small chandelier suited to a 7- to 8-foot ceiling runs $30 to $100 and takes about 30 minutes to install. Turn off power at the breaker, match wire colors (black to black, white to white, ground to ground), and secure the fixture to the existing junction box. If the box is plastic and feels flimsy, replace it with a metal pancake box rated for the fixture’s weight.
Peel-and-stick backsplash tiles or removable wallpaper add pattern and texture without drywall work. Apply to an accent wall or the area behind a floating shelf. Clean the surface thoroughly, let it dry, and install from the center outward to keep patterns aligned. These materials are renter-friendly and can be removed without damage if applied correctly.
Updating cabinet hardware, switch plates, and outlet covers sounds minor but makes a noticeable difference. Brushed nickel or matte black finishes feel current: avoid brass unless you’re committing to a vintage aesthetic. Throw pillows, a new area rug, and cohesive decor (limit yourself to two or three accent colors) pull a room together. A 5×7 or 6×9 area rug anchors seating without overwhelming the floor. Homeowners following Young House Love tutorials often start with paint and lighting, then layer in textiles and accessories as budget allows.
If the flooring is worn, luxury vinyl plank (LVP) is a solid choice. It installs as a floating floor (no glue, nails, or special tools), handles the slight flex in trailer floors, and costs $1.50 to $3.50 per square foot. Let planks acclimate to the room for 48 hours before installation, and leave a ¼-inch expansion gap around the perimeter.
Flooring and Wall Treatments for Single Wide Living Rooms
Original trailer flooring, vinyl sheet or thin carpet over particleboard, doesn’t hold up well to moisture or heavy use. Luxury vinyl plank (LVP) or luxury vinyl tile (LVT) offers durability, water resistance, and a range of wood or stone looks. It installs as a click-lock floating floor, which works well over the slight give in trailer subfloors. Avoid solid hardwood or thick ceramic tile: both are too rigid and heavy for manufactured home floors.
If the existing floor is level and clean, LVP can go right over old vinyl. Patch any soft spots or water damage in the subfloor first. Use a self-leveling underlayment if there are dips or humps. A standard single wide living room (roughly 12×20 feet) requires about 240 square feet of material: buy an extra 10% for cuts and waste.
For walls, wood paneling is common in older trailers. You can paint it (after cleaning, sanding lightly, and priming with an oil-based or shellac primer), cover it with ¼-inch drywall, or install shiplap or tongue-and-groove planks for texture. Drywall adds thickness and a modern look but requires taping, mudding, sanding, and priming, plan on a weekend project for a small room. If going the drywall route, use 1¼-inch drywall screws into studs every 16 inches.
Beadboard or wainscoting on the lower third of walls hides imperfections and adds character. Install with construction adhesive and finish nails, then caulk seams and paint. Keep a ¼-inch gap at the floor for expansion, covered by baseboard. Always wear safety glasses and a dust mask when cutting, and use a miter saw or circular saw with a fine-tooth blade for clean cuts. If walls are uneven, scribe boards to fit rather than forcing straight cuts.
Conclusion
Single wide living rooms reward thoughtful planning. By choosing furniture that fits the footprint, using color and light to open up sightlines, and adding storage that works vertically, these spaces become comfortable and functional. Focus on a few high-impact updates, paint, lighting, flooring, and layer in style through textiles and decor. With a little effort and the right approach, a narrow living room can feel just as inviting as any larger space.