Wall sconces have quietly become one of the most versatile lighting upgrades for living rooms. They free up floor space, add layers of light, and create visual interest on walls that might otherwise stay bare. Unlike table lamps that eat up surface area or recessed cans that require cutting into ceilings, sconces offer controllable ambient lighting exactly where it’s needed, flanking a sofa, highlighting art, or filling dark corners. Installing them isn’t as intimidating as it looks, especially if you’re comfortable with basic electrical work. Whether someone’s tackling a full living room refresh or just tired of relying on a single overhead fixture, sconces deliver function and style without the footprint.
Table of Contents
ToggleKey Takeaways
- Wall sconces in living rooms provide layered, eye-level lighting that reduces glare and shadows while freeing up floor space compared to table lamps or overhead fixtures alone.
- Standard mounting height for living room wall sconces is 60–66 inches from the floor to the fixture center, with 18–24 inches above furniture ideal for reading light and ambient glow.
- Modern LED wall sconces use only 8–12 watts while delivering 60-watt incandescent equivalent output, making them energy-efficient and dimmable for every mood from morning to evening.
- Hardwired sconces typically cost $150–$400 installed, while plug-in options start at $40–$80 and require no electrical expertise or permits, making them accessible for renters and DIY hesitators.
- Key installation steps include confirming power is off with a voltage tester, locating studs or using appropriate anchors, matching wire connections by color, and testing the switch before calling the job complete.
- Wall sconces draw the eye upward and add symmetry when flanking fireplaces or seating, creating visual interest and making rooms feel taller without the aesthetic flatness of recessed cans.
Why Wall Sconces Are Perfect for Living Rooms
Living rooms demand flexible lighting. A single ceiling fixture can’t handle reading, movie nights, and entertaining equally well. Wall sconces solve this by adding layered lighting at eye level, which softens harsh shadows and reduces glare from overhead sources.
Sconces work especially well in homes with low ceilings where pendant lights hang too low, or in rentals where hardwiring ceiling fixtures isn’t an option. They also eliminate the need for multiple floor lamps, which can clutter walkways and limit furniture placement.
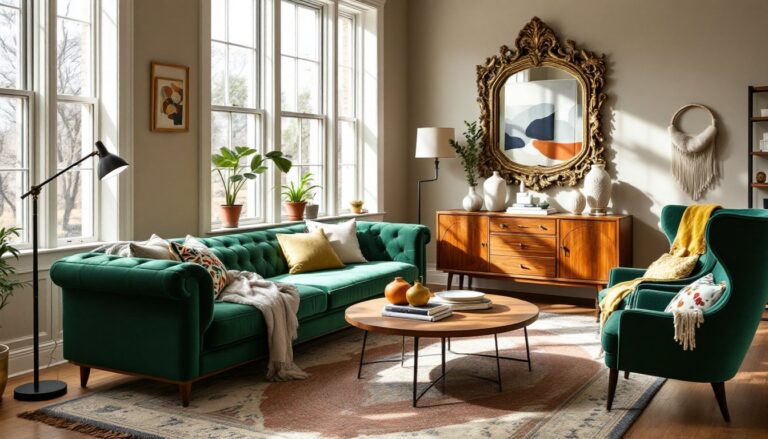
From a design standpoint, sconces draw the eye upward, making rooms feel taller. They add symmetry when flanking fireplaces, doorways, or built-ins, and they highlight architectural details that overhead lighting flattens. Unlike track lighting or recessed cans, sconces contribute to the room’s aesthetic, not just its illumination.
Energy efficiency is another practical win. Most modern sconces use LED bulbs that pull 8–12 watts while delivering the equivalent of 60-watt incandescent output. Pair that with a dimmer switch, and they become the go-to light source for everything from morning coffee to late-night TV.
For anyone working with a tight budget, sconces offer high impact without the cost of rewiring an entire room. A pair of hardwired sconces typically runs $150–$400 installed (depending on the fixture and local electrician rates), while plug-in options start around $40–$80 per unit and require zero electrical experience.
Choosing the Right Wall Sconce Style for Your Living Room
Selecting a sconce style isn’t just about aesthetics, it’s about matching the fixture to the room’s function and existing finishes. The wrong choice can feel like an afterthought, while the right one ties the space together.
Modern and Contemporary Sconce Designs
Modern sconces favor clean lines, geometric shapes, and minimal ornamentation. Look for finishes like brushed nickel, matte black, or aged brass, which pair well with neutral color palettes and streamlined furniture. Many contemporary designs use exposed bulbs or frosted glass to create diffused, glare-free light.
Swing-arm sconces are a subcategory worth considering for reading nooks or beside seating. They allow directional control, making them practical for task lighting without taking up table space. Models with articulating arms typically extend 12–18 inches from the wall, so they need clearance.
For living rooms with a minimalist approach featured on Dwell, sconces with integrated LED strips or backlit panels eliminate the bulb entirely, creating a floating effect that works well in media rooms or behind seating areas.
Traditional and Vintage-Inspired Options
Traditional sconces lean into details: candelabra-style arms, fabric shades, crystal accents, or oil-rubbed bronze finishes. These work in homes with crown molding, wainscoting, or furniture with turned legs and carved details.
Candle-style sconces (with or without shades) flank fireplaces or built-ins beautifully, especially in rooms with a formal layout. If the living room has existing hardware in a specific finish, like door hinges or curtain rods, matching the sconce finish creates cohesion.
Vintage-inspired Edison bulb sconces split the difference between industrial and traditional. They pair well with reclaimed wood, leather furniture, and exposed brick, adding warmth without feeling overly ornate. According to design trends highlighted by House Beautiful, these fixtures have seen a resurgence in transitional spaces that blend old and new elements.
Where to Install Wall Sconces in Your Living Room
Placement makes or breaks sconce functionality. Install them too high, and they become decorative but useless. Too low, and they create glare or get bumped.
Standard mounting height for living room sconces is 60–66 inches from the floor to the center of the fixture. This keeps the light at eye level when standing and prevents glare when seated. If the sconces flank a sofa or credenza, measure from the furniture’s surface, 18–24 inches above is ideal for reading light or ambient glow.
For fireplace flanking, center the sconces on the mantel and space them 4–6 feet apart, depending on the wall width. This creates symmetry without crowding the focal point. If the mantel is particularly tall or ornate, mounting sconces slightly above its midpoint keeps them from disappearing visually.
In rooms without a clear focal point, consider corner placement. A sconce in each corner eliminates dead zones and makes the room feel larger. This works especially well in square or boxy layouts where a single overhead fixture casts uneven light.
Behind seating areas, sconces provide task lighting without the bulk of floor lamps. Mount them 12–15 inches above the sofa back and ensure they’re positioned so the light hits the reader’s shoulder, not their eyes. Swing-arm models excel here.
One often-overlooked spot: beside doorways or hallway entrances. A sconce near the threshold guides foot traffic and adds architectural definition. For homes integrating other decorative wall elements, sconces can act as bookends to gallery walls or large art pieces.
Always check for studs or blocking before committing to a location. Drywall anchors hold lightweight fixtures, but hardwired sconces with metal housings need solid backing. A stud finder (around $15–$30) saves time and avoids accidental plumbing or wire hits.
How to Install Living Room Wall Sconces (DIY Guide)
Hardwiring a sconce is a manageable DIY project for anyone comfortable working with electrical boxes, but it’s also the kind of job where hiring a licensed electrician makes sense if there’s any hesitation. This work requires turning off power at the breaker and confirming voltage is off with a non-contact voltage tester.
Tools & Materials:
- Non-contact voltage tester (essential for safety)
- Wire stripper and wire nuts
- Screwdriver (flathead and Phillips)
- Drill with spade bit (if installing a new junction box)
- Electrical box (old-work box if no stud is available)
- Wire clamps and Romex cable (if running new wire)
- Wall sconce fixture
- Safety glasses and work gloves
Step-by-Step Installation:
-
Turn off power at the breaker panel for the room. Use the voltage tester to confirm the wire is dead, don’t skip this. Even experienced electricians double-check.
-
Mark sconce placement using a level and pencil. If there’s no existing electrical box, locate the nearest power source (often a nearby outlet or switch) to determine if new wire needs to be run. Running wire through walls may require drilling through studs or using fish tape, and it’s where most DIYers call a pro.
-
Install the electrical box if one isn’t present. Old-work boxes (the kind with wings that clamp behind drywall) work for non-load-bearing walls. If the wall is plaster or the sconce is heavy (over 5 pounds), mount the box to a stud or install blocking.
-
Run wire from the power source to the box if needed. This typically means pulling 14/2 or 12/2 Romex through the wall cavity. Secure the cable with clamps where it enters the box. If this step feels over your head, stop here and hire out, improper wiring is a fire hazard and won’t pass inspection if permits are required.
-
Strip wires about 1/2 inch from the ends. Match the sconce’s wires to the house wiring: black (hot) to black, white (neutral) to white, and green or bare copper (ground) to the ground wire. Twist the wires together clockwise, then cap each pair with a wire nut. Tug gently to confirm they’re secure.
-
Attach the mounting bracket to the electrical box using the screws provided. Most sconces come with a crossbar or strap that screws directly into the box’s threaded holes.
-
Connect the sconce by tucking the wired connections into the box and aligning the fixture’s base plate over the mounting bracket. Secure with decorative screws. Install the bulb (check the fixture’s max wattage rating), then attach any shades or covers.
-
Restore power at the breaker and test the switch. If the sconce doesn’t light, turn the breaker back off and recheck wire connections.
Permit and Code Notes:
Most jurisdictions require an electrical permit for new wiring or new circuits. Adding a sconce to an existing circuit (like tapping into a nearby outlet) may or may not require a permit depending on local codes. When in doubt, call the local building department. National Electrical Code (NEC) mandates proper box fill calculations, grounding, and cable protection, another reason to consider hiring a licensed electrician if the project involves anything beyond swapping an existing fixture.
Plug-In Alternative:
For renters or anyone avoiding electrical work, plug-in sconces mount with screws or adhesive strips and use a cord that runs down to a nearby outlet. They’re not as clean-looking, but cord covers (available in paintable plastic or fabric) minimize the visual impact. This route skips permits entirely and costs a fraction of hardwired installation.
Conclusion
Wall sconces deliver layered lighting, free up floor space, and add architectural interest, all without the complexity of recessed lighting or the clutter of table lamps. Whether someone’s hardwiring a pair beside the sofa or opting for plug-in convenience, the right placement and style turn a functional upgrade into a design statement. Just remember: measure twice, test for voltage, and don’t skip the stud finder.